RSS
Facebook
Twitter

Showing posts with label Samsung Galaxy. Show all posts

Sunday, 9 March 2014

 ေဇာ္ဂ်ီေဖာင့္ဟာ Android Version 4.2.2 ကေနစၿပီး သံုးလို႔မရေတာ့ပါဘူး ... Root ေဖာက္ၿပီးမွသာအသံုးျပဳႏုိင္ၾကတယ္။ 
Root ေဖာက္ၿပီးသံုးတာေတာင္ Font ပံုစံ,ဒီဇိုင္းတြေျပာင္းလဲလို႔မရပါဘူး။ အခုျပသာနာကို ဒီေဖာင့္ေလးမ်ားကေျဖရွင္းေပး နိုင္ပါတယ္။ ႀကိဳက္နွစ္သက္ရာ Font ကိုထည့္သြင္းအသံုးျပဳႏုိင္ပါတယ္။
 
Samsung ဖုန္း ေတြအတြက္အဓိကထားလုပ္ေဆာင္ထားတာျဖစ္ပါတယ္
 
 တစ္ျခားဖုန္းေတြ ကိုေတာ့စမ္းသပ္ျခင္းမျပဳလုပ္ရေသးပါဘူး။ ကြၽန္ေတာ္စမ္းသပ္ထားတာေတာ့ Version 4.3 အထိျဖစ္ပါတယ္။
 
 
Credit : Thet Paing


OR


Friday, 28 February 2014

com.moletag.galaxy.s4.remote-1_web.jpg com.moletag.galaxy.s4.remote-2_web.jpg

မဂၤလာပါဗ်ာဖုန္းအတြက္ Galaxy S4 Universal Remote ကိုတင္ေပးလိုက္ပါတယ္ ပံုမွာျပင္ယံုနဲ႔သိႏိုင္ေလာက္ပါတယ္ေနာ္ Remoteစတိုင္းလွလွေလးပို႔ျပန္တင္ေပးလိုက္တာပါ

Play Store မွာဘတ္ 128.69 နဲ႕ေရာင္းပါတယ္

ဒီဆိုဒ္ကေလးမွာေတာ့မေရာင္းပါဘူးအခမဲ့ပါ

 Android Version 4.0ႏွင့္အထက္ဖုန္းမ်ားမွာအသံုးျပဳႏိုင္ပါတယ္

သူငယ္ခ်င္းတို႔ဖုန္းကိုRemoteစတိုင္ထည့္သံုးခ်င္ရင္ေတာ့
ေအာက္မွာေဒါင္းယူသြားႏိုင္ပါတယ္


 Android 4.0 and up
**Constantly updating to add more devices. If you can't find your device please send us your device info and we will add it for you!**

Turn your phone into a universal remote control using your phone's built-in IR transmitter. No external hardware required. No network connection required. No permissions required. Lifetime return policy!

Control your TV, your Set-top Box, your Audio Video Receiver, your Amplifier, your DVD Player, your Blu-ray Player, your Air Conditioner, your Projector, your DSLR camera, your PS3, your Xbox, and more! Prank your friends, anything you'd like with this user-friendly remote control!

Additional features:
· Save each one of your devices so that you can easily access them later.
· Control all of your devices from just one screen, by creating your own custom remote, where you can add buttons from different devices in a single tab!
· Change the style of each button in your custom remotes.
· Save a sequence of actions (macro) to be executed one by one. For example you can turn on your TV, turn on your cable box, wait 1 second, go to channel 100 and turn up the volume. All of these actions saved in a single button.
· You can send your own custom IR code and save it to a button.

If you notice any bugs, or your device is not supported, please contact us at support@moletag.com and we will fix it for you! Additionally, if you're not happy with the app just send us your order details and we will refund you. We guarantee a lifetime return policy.

Note: This application works only with phones that have an IR blaster (infrared blaster) embedded (currently Samsung Galaxy S4, Galaxy S4 Active, Galaxy S4 Mini, Galaxy S4 Zoom, Galaxy Note 3, Galaxy Note 8.0, Galaxy Note 10.1, Galaxy Tab 7.0 Plus, Galaxy Tab 2, Galaxy Tab 3, Galaxy Mega). If it doesn't work with your device, instead of leaving a poor comment, please send us your order details and we will instantly refund you.

----------------------------
Currently supporting over 500,000 devices

What's New
Version 3.1.5
· Added landscape option
Added more models for the following brands upon users requests:
· TV's: Accuvision, Ferguson, Hannspree, Ilo, Mitsubishi, Sylvania
· Cable & Satellite boxes: Azbox, Green Dot, Mag 250, NEC, VU+
· AV Receivers: Grace Digital, Marantz, Memorex, Sylvania, Windows Media Center
· DVD & Blu-ray Players: Aiwa, Dynex, Rowa, Sylvania
· Projectors: Optoma



                  GOOGLE PLAY BUY

               DOWNLOAD APP FREE 

http://www.aungkyawthyu.com/

Wednesday, 26 February 2014


Samsung firmware Updates - screenshot thumbnailSamsung firmware Updates - screenshot thumbnailSamsung firmware Updates - screenshot thumbnailSamsung firmware Updates - screenshot thumbnail
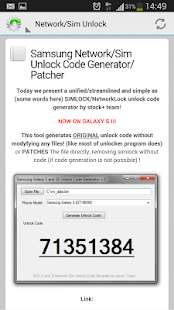
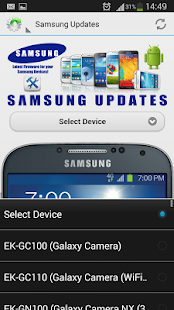
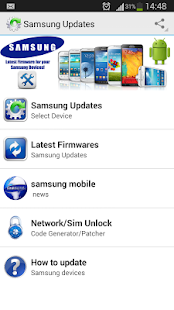
Samsung ဖုန္းေတြအတြက္လိုအပ္သည့္ Update Firmware မ်ားကိုအတိအက်ရွာေပးႏိုင္သည့္ ( Android Application ) ျဖစ္ပါတယ္.. 

မိမိဖုန္းအတြက္ ေနာက္ဆံုးေပၚ Firmware မ်ားကို အတိအက် Link ေပးႏိုင္ၿပီး
Network Unlock/ Sim Unlock လည္းလုပ္လို႕ရပါတယ္..


 လိုအပ္သူမ်ား Download ရရယူႏိုင္ပါၿပီ။


Download => GooglePlay / Zippyshare 


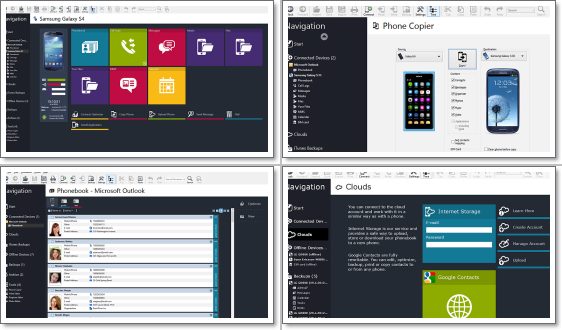
MOBILedit!+Enterprise


ဒါေလးက Android မွမဟုတ္ အျခား Apple, Nokia Symbian, Mee go, Blackberry, Windows,
Bada, Media Tak စတဲ့ OS အသံုးျပဳ Phone အားလံုးမွာပါ Support လုပ္ပါတယ္။
 
 ဒါေၾကာင့္ မိမိက
Phone နွစ္မ်ိဳးသံုးမ်ိဳး သံုးထားလည္း ဒီေကာင္ေလးတစ္ခုရွိယံုနဲ႔ အဆင္ေျပေျပသံုးလို႔ရမွာျဖစ္ပါတယ္။
 
သူ Support လုပ္တဲ့ ဖုန္းအမ်ိဳးအစားေတြကလည္းေတာ္ေတာ္စံုလင္တာေၾကာင့္ ေဖာ္ျပေပးရရင္ Post
မဆန္႔မွာေတာင္စိုးလို႔ ေလ့လာလို႔ရေအာင္ ေအာက္မွာလင့္ေလးေတြပါတြဲေပးလိုက္ပါတယ္..။

phoneview-tile

mb

MOBILedit! New Features (Update on 16 Jan 2014)

Highlights:

  • Recover your iPhone from encrypted iTunes Backup
  • Backup, transfer and install iOS applications
  • Backup all data including applications and user data from your Android
  • Windows Phone 8 support for contacts and files
  • Manage your files more easily in the new filtered folders of Media and User Files
  • No more hassle with connecting a phone due to the integration of intuitive device recognition and a USB driver repair feature
  • Hundreds of new phones added including latest iPhone and Android versions
In Details:
  • Encrypted iPhone Backups supported, just enter your password and it will allow you to browse the backup or transfer it to another device
  • Full native backup and restore of iOS. Restores everything including apps to another iOS device
  • Windows Phone 8 support – read contacts via Bluetooth, manage files and write contacts via cable using the phone copier plugin
  • Improved Ringtone Editor for saving ringtones to newest versions of iOS and Android
  • Faster reading of contacts from iPhone over Wi-Fi
  • New file-system folder structure supported for Android and iOS
  • Applications – contains a list of installed apps including data
  • Media – contains photos, videos, music, recordings, ringtones, etc.
  • User Files – contains files downloaded from the internet and other files created by user
  • File-system Backup and Restore significantly improved including support for large files
  • Android Application Install and Backup improved (backs up all data using native android backup)
  • Media Mode (MTP) connection detection and resolve
  • ‘Read All’ function improved
  • Many improvements and faster browsing in Messages and File-system
  • Design of printed records improved (e.g. contacts, messages)
  • Minor activation glitches removed
  • Hundreds of new phones added
Enterprise edition special features
  • license allowing commercial useUSSD messages
  • OTA Settings
  • Encrypted SMS
  • SMS Auto-reply
  • SMS automatically moved to Archive
  • Keyboard plugin

Home Page :  http://www.mobiledit.com/

Support Phone Lists :
http://www.mobiledit.com/phones.htm

User Guide :
http://www.mobiledit.com/guide.htm


Download Driver Pack v(1.0.9.1)

Tusfiels / UsersFiles

Credit to : http://www.bloggerkoyan.com

samsung ဖုန္းတစ္လံုးကို လိုရာသံုးဖို ့အခ်ိန္ေရာက္ပီ......ေနာ္ 
သင္ ့ရဲ ့ samsung ဖုန္းတစ္လံုးကို universal remote control အျဖစ္   TV, AIR CONDITIONER ( A/C ) , DSLR CAMERA , DVD PLAYER , BLU RAY, CABLE BOX, MEDIA PLAYER, HOME CINEMA, AUDIO SYSTEM, HI FI, XBOX 360 , CAR AUDIO, RGB LEDS and other IR devices စတဲ ့အမ်ိဳးမ်ိဳး ကို သင္ ့ဖုန္းကေန ထိမ္းခ်ဴပ္လို ့ရမွာ ျဖစ္ပါတယ္။ samsung ဖုန္းေတြအတြက္
မေန ့က ( 25 .2.2014 ) ရက္ေနမွ playstore ေပၚမွာတင္တာေတြ ့လို ့ျပန္လည္မ်ွေဝေပးလိုက္ပါတယ္.....အသံုးျပဳမယ္ဆိုရင္ေအာက္ပါအမ်ိဳး
အစားေတြကို အသံုးျပဳလို ့ရပါတယ္..... Samsung Galaxy Tab 7.0 plus
Samsung Galaxy Tab 7.7 plus
Samsung Galaxy Tab 2 7.0
Samsung Galaxy Tab 2 10.1
Samsung Galaxy Tab 3 8.0
Samsung Galaxy Note 3
Samsung Galaxy Note 8.0
Samsung Galaxy Note 10.1
Samsung Galaxy S4
Samsung Galaxy S4 mini
Samsung Galaxy MEGA
က်န္တဲ ့ဖုန္းအမ်ိဳးအစားေတြက ေတာ ့ အဆင္မေျပနိုင္ပါဘူးခင္ဗ်ာ.....
ေဒါင္းလုပ္ယူရန္  ,  link 1   , link 2

Thursday, 20 February 2014


ဒီလုပ္ငန္းကိုစဖို႕ ES File Manager ကို Install လုပ္ရပါမယ္

ES File Manager ကို ဒီ မွာေဒါင္းပါ - Download Here

၁။ ES File Manager ကိုဖြင့္ပါ

၂။ ျပီရင္ /system/build.prop ကိုဝင္ပါ

၃။ /system/build.prop ကို ES File Manager ထဲမွာ Built-in ပါတဲ့
Text Editor နဲ႕ဖြင့္ပါ။

၄။ ျပီ ရင္ေအာက္မွာေပးထားတဲ့ Command ေတြကို မွန္ေအာင္႐ိုက္ပါ

1. Internet Speed Enhancement: ( အင္တာနက္ ႏွုန္းျမႇင့္ရန္ )

net.tcp.buffersize.default=4096,87380,256960,4096,16384,256960
net.tcp.buffersize.wifi=4096,87380,256960,4096,16384,256960
net.tcp.buffersize.umts=4096,87380,256960,4096,16384,256960
net.tcp.buffersize.gprs=4096,87380,256960,4096,16384,256960
net.tcp.buffersize.edge=4096,87380,256960,4096,16384,256960

2. Disable Bootanimation For Quicker Boot: ( Power On လွ်င္ Samsung animation Logo ေျဖာက္၍ ျမန္ျမန္ Boot တတ္ရန္)

debug.sf.nobootanimation=1

3. Fix App Issues: ( Application Error မ်ားေျဖရွင္းရန္ )

ro.kernel.android.checkjni=0

4, Get Rid of Black-Screen Issue After Ending A Call: ( End Call ႏွိပ္ျပီရင္ BlackScreen နဲ႕ အခ်ိန္ ၾကာမႈကို ျမန္ေစရန္ )

ro.lge.proximity.delay=25
mot.proximity.delay=25

5. 3G Signal Optimization Tweaks: ( 3G လိုင္း ကို ျမႇင့္တင္ရန္ )

ro.ril.hsxpa=2
ro.ril.gprsclass=10
ro.ril.hep=1
ro.ril.enable.dtm=1
ro.ril.hsdpa.category=10
ro.ril.enable.a53=1
ro.ril.enable.3g.prefix=1
ro.ril.htcmaskw1.bitmask=4294967295
ro.ril.htcmaskw1=14449
ro.ril.hsupa.category=5

6. Save Battery: ( Battery ကို ၾကာၾကာခံေစရန္ )

wifi.supplicant_scan_interval=180
pm.sleep_mode=1
ro.ril.disable.power.collapse=0

7. Rendering User Interface With GPU: ( Graphic Interface ကိုခ်ိန္ညွိရန္ )

debug.sf.hw=1

8. Enhance JPG Image Quality To 100 %: ( ဓတ္ပုံ အရည္ေသြးျမႇင့္ရန္ )

ro.media.enc.jpeg.quality=100

9. Decrease Delay While Dialing A Number: ( ဖုန္း ေခၚရင္ Dial-pad ကိုဖြင့္ရင္ ျမန္ျမန္ပြင့္ေစရန္ )

ro.telephony.call_ring.delay=0

-----------------------------------------------------------------------------

Wednesday, 19 February 2014

မဂၤလာပါဗ်ာ ကၽြန္ေတာ္ဒီေန.တင္ေပးခ်င္တာေလးကေတာ့ ကၽြန္ေတာ့ဆရာတစ္ေယာက္ စမ္းသပ္ျပီး ေအာင္ျမင္လို. ျပန္လည္ေ၀မွ်တာပဲျဖစ္ပါတယ္ မသိေသးသူမ်ားအတြက္သာရည္ရြယ္ပါတယ္ဗ်ာ သိျပီး သားဆိုလဲေက်ာ္သြားလိုက္ေပါ့ .....:D ကိုယ္တိုင္စမ္းသပ္ေအာင္ျမင္ထားတာပါ Knowledge တစ္ခုအေန နဲ.မဟုတ္ပဲ လက္ေတြ.စမ္းသပ္ခ်င္တယ္ဆိုရင္ေတာ့ use own risk ပါလို.ၾကိဳေျပာပါရေစ ေနာ္......

                         -----------------------------------------------------------

အခ်ိဳ ႔ samsung phone ေတြက bluetooth ကူးတာ dowload ဆြဲတာတို႔ကို phone storage ထဲကို သြားသိမ္းပါတယ္..ကင္မရာရိုက္ရင္လည္း phone storage ထဲသြားသိမ္းတာပဲ...setting ထဲကေနလည္း သြားခ်ိန္လို႔မရဘူးေနာ္...အဲဒီေတာ့ sd card ကို phone storage လုပ္ေပးလိုက္မယ္ဆိုရင္အဆင္ေျပသြားတာေပါ့....
လုပ္နည္းကေတာ့ လြယ္ပါတယ္.. root explorer နဲ႔ system ထဲကုိ သြားျပင္ေပးရမွာပါ....( need root )

root explorer > system / etc ထဲက vold.fstab ဆိုတဲ့ file ကို နည္းနည္းေလးၾကာေအာင္ဖြင့္ျပီး open in text editor နဲ႔ ဖြင့္လိုက္ပါ.... r/o ကို r/w ေျပာင္းထားရမယ္ေနာ္...
ေအာက္က စာေလး 2 ေၾကာင္းကို ေတြ႔ေအာင္ရွာပါ.....
text က phone တခုနဲ႔ တခု တူခ်င္မွတူမွာေနာ္...အခုဟာကေတာ့ huawei ထဲကပါ....ေသခ်ာရွာေနာ္...ဆင္တူရုိးမွားေလးေတြရိွတယ္...

dev_mount sdcard /mnt/sdcard emmc@fat /devices/platform/goldfish_mmc.0 /devices/platform/mtk-sd.0/mmc_host

dev_mount sdcard2 /mnt/sdcard2 auto /devices/platform/goldfish_mmc.1 /devices/platform/mtk-sd.1/mmc_host

အခု ကြ်န္ေတာ္တို႔က mnt ရဲ ႔ေနာက္က sdcard နဲ႔ sdcard2 ကို ေနရာခ်င္း change ေပးရမွာပါ...

" sdcard    ရဲ ႔ေနာက္မွာ 2 ထည့္ျပီး
sdcard2 ကို ေနာက္က 2 ဖ်က္ေပးလိုက္ပါ..."

ျပီးရင္ menu>save လုပ္ျပီး restart ခ်ေပးလိုက္ပါ...reboot တက္လာရင္ storage ထဲ သြားၾကည့္လိုက္ပါ....sd က phone storage ေျပာင္းေနမယ္ေနာ္......

စမ္းခ်င္သပဆိုရင္ စမ္းႏုိင္ပါတယ္...use own risk လို.ေျပာျပီးသားေနာ္... :P ေပးထားတဲ့ guide အတိုင္းလုပ္ရင္ေတာ့ အဆင္ေျပမွာပါ......အားလံုးပဲအဆင္ေျပပါေစဗ်ာ


တျခားေသာ ဖုန္းအမ်ိဳးအစားမ်ားမွာ ေမာ္ဒယ္ျမင့္ဖုန္းတစ္ခ်ိဳ႕သာ Android version 4.4 ကုိ update ေပးေနၾကခ်ိန္မွာ Samsung ဟာသူ႕ရဲ႕ Samsung Galaxy စီးရီး၀င္ ဖုန္းေတြထဲက
ဖုန္းေတာ္ေတာ္မ်ားမ်ားကုိ Android version 4.4.2 KitKat update ကုိေပးဖုိ႕စီစဥ္ေနပါတယ္။ 


ဒီေဆာင္းပါးကုိ ဖတ္ရႈျခင္းျဖင့္ Samsung ဟာ ဘယ္ဖုန္းေတြကုိ Android version 4.4.2 သုိ႕ upgrade လုပ္ခြင့္ေပးမလဲဆုိတာကုိ သင့္အေနနဲ႕သိရွိနုိင္ပါလိ္မ့္မယ္။ 

Samsung ဟာ သူ႕ရဲ႕ေနာက္ဆုံးထြက္ရွိထားတဲ့ Samsung Galaxy Note 3 အပါအ၀င္ Galaxy ဖုန္းအမ်ိဳးအစား ၁၂ မ်ိဳးခန္႕ကုိ Android version 4.4.2 သုိ႕ ျမွင့္ခြင့္ေပးမွာျဖစ္တယ္လို႕ဆုိပါတယ္။ 

ယင္းစာရင္းထဲမွာ Samsung Galaxy S4 သည္လည္းပါ၀င္ျပီး S4 ကုိေျပာင္းလဲထုတ္လုပ္ထားတဲ့ Samsung Galaxy S4 Zoom , Galaxy S4 Active စသည့္ဖုန္းမ်ားလည္း Android 4.4.2 ျမွင့္ခြင့္ရရွိမည့္စာရင္းထဲတြင္အက်ဳံး၀င္မွာျဖစ္ပါတယ္။ 

Samsung Galaxy S3 ပင္လွ်င္ Android 4.4.2 သုိ႕ျမွင့္ခြင့္ရမွာျဖစ္ျပီး S3 ကုိေျပာင္းလဲထုတ္လုပ္ထားတဲ့ Samsung Galaxy S3 Mini သည္လည္း Android version 4.4.2 သုိ႕ျမွင့္ခြင့္ရစာရင္းထဲတြင္ပါ၀င္ပါတယ္။ 

Screen ၆ လက္မေက်ာ္တဲ့ Samsung Galaxy Device ေတြျဖစ္တဲ့ Galaxy Mega, the Galaxy Light, Galaxy Note 8.0, Galaxy Tab 3 and the Galaxy Note 10.1 ကဲ့သုိ႕ေသာ Phoneblet device ေတြဟာလည္း Android version 4.4.2 KitKat သုိ႕ update လုပ္လုိ႕ရမွာျဖစ္ပါတယ္။ 

Android 4.4.2 version update ကုိရရွိမည့္ Samsung Galaxy ဖုန္းမ်ားစာရင္းအျပည့္အစုံကေတာ့ ေအာက္ပါအတိုင္းပါ။

Galaxy Note 3
Galaxy Note 2
Galaxy S4
Galaxy S4 Mini
Galaxy S4 Active
Galaxy S4 Zoom
Galaxy S3
Galaxy S3 Mini
Galaxy Mega (all versions)
Galaxy Light
Galaxy Note 8.0
Galaxy Tab 3
Galaxy Note 10.1 (original and 2014 edition both)

ဒီစာရင္းထဲမွာသာ သင့္ဖုန္းပါတယ္ဆုိရင္ေတာ့ Android Version 4.4.2 ရဲ႕အရသာကုိခံစားၾကည့္ဖုိ႕ သင့္အေနနဲ႕အသင့္ျပင္ထားနုိင္ပါျပီ။


Welcome From My Blog


Monday, 17 February 2014


Samsung Android V4.3 အထက္မ်ားကို ကလစ္တစ္ခ်က္ႏွိပ္ယံုနဲ႔
+ ျမန္မာေဖာင့္ရျခင္း  + ျမန္မာစာမွန္ေသာ 4.3 အတြက္ေဖာင့္ျဖစ္ျခင္း  + ဖုန္းတစ္ခုလံုး ျမန္မာစာစနစ္ပါ ေျပာင္းလို႕ရျခင္း  + စမ္ေဆာင္းရဲ႕ ျမန္မာကီးဘုတ္ပါ ပါျခင္း  + ေနရာတိုင္း ၿမန္မာစာျမင္ရျခင္း   + ဘယ္ေဖာင့္မွလဲ မေပ်ာက္ျခင္း  
 
ျမန္မာေဖာင့္ပါၿပီး ျမန္မာစာလြဲေနတဲ့ 4.3 အထက္ဖုန္းေတြလဲ ျမန္မာစာမွန္သြားၿပီး ေျပာထားတဲ့အခ်က္ေတြအတိုင္းျဖစ္သြားမွာပါ :) 
4.3 အထက္ဖုန္းမွာ ( -် ) ( -ဳ ) ( -ဴ ) ( -ာ ) ( -္ ) ( -့ ) ေတြ အထဲကိုဝင္ေနတဲ့ျပသနာကို က်ေနာ္အနည္းငယ္ေျဖရွင္းထားလို႕ စာကိုတည့္မွန္စြာျမင္ရမွာျဖစ္ပါတယ္ ။
 
ေအာက္တြင္ေဖာ္ျပထားသည့္  ပထမပံုကေတာ့ ေဖာင့္မထည့္ခင္ကပံုပါ ။ ဒုတိယပံုကေတာ့ ေဖာင့္ထည့္ၿပီးပံုပါ :) 
 
  4.3 အတြက္ ေဖါင့္မထည့္ခင္


   xxxxxxxxx

  4.3 အတြက္ ေဖါင့္ထည့္ၿပီး


အသံုျပဳနည္း  ။  ။ 
သင့္ဖုန္းမွာ Root ရွိထားရပါမယ္  
KNOX ကို ထို Apk နဲ႔ သတ္ထားပါ http://pc.cd/uCV
မိမိဖုန္းကို USB on ထားပါ ၿပီးရင္ ပါဝါဖြင့္လွ်က္တိုင္းၾကိဳးခ်ိတ္လိုက္ပါ ။ 
ဖိုဒါအထဲက installer.bat ဆိုတဲ့ ေဒတာေလးကိုဖြင့္လိုက္ၿပီး Enter ေခါက္လိုက္ပါ  ဖုန္းမွာ Root ေတာင္းပါမယ္ ႏွိပ္ေပးလိုက္ပါ ဖုန္းရီစတတ္က်သြားပါမယ္ 
ၿပီးပါၿပီ ၾကည့္ၾကည့္လိုက္ပါ အေပၚမွာေရးၿပထားတဲ့ အခ်က္ေတြတိုင္းရသြားပါမယ္ ။
ေဆာ့ဝဲကို 2 မ်ိဳးေပးထားပါတယ္ ပထမတစ္ခုနဲ႕မရရင္ ေနာက္တစ္ခုနဲ႕လုပ္လိုက္ပါ ေသခ်ာေပါက္ရသြားမွာျဖစ္ပါတယ္ ။ စမ္ေဆာင္း 4.3 ဖုန္းအားလံုးအတြက္ သီးသန္႔ပါ..
SmartZawgyi 4.3 Advanced http://pc.cd/h90

SmartZawgyi 4.3 Advanced Preroot http://pc.cd/ge0 

( မွတ္ခ်က္ ။ ။ မိမိဖုန္းကို ျမန္မာေဖါင့္ရရန္အတြက္ တျခားေဖါင့္ခ်ိန္ခ်ာေတြနဲ႔ ျမန္မာေဖာင့္ကိုထည့္ထားပါက က်ေနာ့္ျမန္မာေဖါင့္ ttf ဖိုင္နဲ႕ ထည့္လို႕မရၾကတတ္ပါဘူး ။ 
 
အဲ့အခါၾကရင္ေတာ့ xml အပိုင္းကို နားလည္သူကေတာ့ လည့္ပတ္ၿပီး ထည့္သြားရင္ေတာ့ အဆင္ေျပပါမယ္ ။
 
နားမလည္တဲ့သူကေတာ့ မိမိဖုန္းကို ဖန္ဝဲတင္လိုက္ၿပီးေတာ့ ျမန္မာစာရရန္မွန္ရန္အတြက္ က်ေနာ့္ေဖါင့္ကို က်ေနာ္ျပထားသည့္နည္းအတိုင္း ထည့္ေပးလိုက္ပါ အဆင္ေျပသြားပါမယ္ :)

တစ္ခ်ိဳ႕ေတြက ေဖာင့္ဆိုဒ္ေသးတယ္လို႕ေျပာၾကပါတယ္ ။ အမွန္ေတာ့ ဒါဟာဖုန္းတစ္လံုးရွိရမည့္ ဆိုဒ္ပါပဲ ။ ျမန္မာေဖာင့္ပါဝင္လာတဲ့ စမ္ေဆာင္းဖုန္းထဲက ZawgyiOne 2008 ကို ျပန္လည့္ျပဳျပင္ထားတာပါ ။ 
စမ္ေဆာင္းဖုန္းနဲ႕ HTC ဖုန္းေတြက ဘာ့ေၾကာင့္ ေဖာင့္ကိုေသးထားရလဲဆိုတာကေတာ့ ပံုမွန္ဖုန္းတစ္လံုးမွာရွိရမည့္ေဖာင့္ဆိုဒ္ကို ေရြးခ်ယ္ထားလို႕ပါပဲ ။ 
 
ေဖာင့္အၾကီးနဲ႕ ဖုန္းေတြကိုၾကည့္ၾကည့္လိုက္ပါ စာေတြဟာအေပၚေၾကာင္းနဲ႕ ေအာက္အေၾကာင္းထိေနတာ ေအာက္ပိုင္းပ်က္ေနတာေတြကို ေတြ႔ရမွာၿဖစ္ပါတယ္ ။  ( Samsung HTC ၿမန္မာစာပါဝင္လာတဲ့ဖုန္းေတြဟာ အဲ့တာေၾကာင့္ ေဖာင့္ကိုအေသးနဲ႕လာတာပါ )
xxxxxxxxxxxxxxxxxxxxxxxxxxxxxxxxxxxxxx
 
အဆင္မေျပမွဳမ်ား ရွိပါက ေမးျမန္းလိုပါက ( သို႕ ) ေဒါင္းေလာ့လင့္မ်ား ေဒါင္းမရေတာ့ပဲ ေသသြားခဲ့ပါက ။ MyanmarMobileForum(MMF) ဂရုမွာ လာေရာက္ေမးျမန္း ေတာင္းဆိုႏိူင္ပါတယ္ ။ မန္ဘာဝင္ထားၾကဖို႕လဲ ဖိတ္ေခၚပါတယ္ :)


Credit :  http://freemobilesharing.blogspot.com

Tuesday, 11 February 2014

samsung USB driver မ်ား


samsungသံုးေနတဲ ့သူငယ္ခ်င္းေတြအတြက္ပါအေၾကာင္းအမ်ိဳးမ်ိဳးေၾကာင့္ driverေပ်ာက္သြားတာေတြျဖစ္တတ္ပါတယ္ ဖုန္းေဆးေတာ့ Backup and resed မလုပ္မိေတာ့ ေပ်ာက္သြားတတ္ပါတယ္ ရွိေနတဲ ့သူငယ္ခ်င္းေတြလဲသိမ္းထားရတာေပါ့

အသံုးျပဳရတာလြယ္ပါတယ္  စမ္းၾကည္ပါ

<<<<<<<<download>>>>>>>>


Galaxy SM-N900 Version 4.3


Galaxy SM-N900 Version 4.3 ျမန္မာစာ ပါျပီးသားပါ။ 

လုိအပ္တယ္ဆုိရင္ ေအာက္မွာ Download လုပ္ယူႏုိင္ပါတယ္။ 
၂ ေနရာကေန တင္ေပးထားပါတယ္။

 ေကာင္းတာကေတာ့ Google Drive ကေန Download လုပ္ပါ။ 

အဆင္ေျပမယ္လုိ႔ ေမွ်ာ္လင့္ပါတယ္။


Password = www.nyinaymin.org


Galaxy mini2 GTS6500D official 2.3.6


Galaxy mini2 GTS6500D official Firmware Version 2.3.6 ပါ။ ေနာက္ဆုံးထြက္ Version ပါပဲ။ လုိအပ္တယ္ဆုိရင္ ေအာက္မွာ Download လုပ္ယူႏုိင္ပါတယ္။ 
 
အဆင္ေျပလိမ့္မယ္လုိ႔ ေမွ်ာ္လင့္ပါတယ္။


Password = www.nyinaymin.org


Tuesday, 4 February 2014


Samsung Galaxy ေတြမွာ Root မလုိဘဲ ျမန္မာစာထည့္ႏိုင္တဲ့ Zawgyi-One Flip 4.3 ျဖစ္ပါတယ္..
လိုအပ္သူမ်ားေအာက္မွာအဆင္ေၿပတဲ့လင့္ကေဒါင္းသြားလိုက္ပါ......


Download >>> Link1 (or) Link2 (or) Link3

Thursday, 30 January 2014


မဂၤလာပါ သူငယ္ခ်င္းတစ္ေယာက္ အကူအညီလွမ္းေတာင္းထားတဲ့ Galaxy Tab3 10.1 P5220 ကို Root လုပ္နည္းေလးေရးေပးမွာျဖစ္ပါတယ္.. သူလွမ္းေမးတုန္းကေတာ့ Vroot နဲ႔ Root လိုက္ပါလို႔ အလြယ္ေျပာလိုက္တာ .. မရဘူးေျပာလို႔ မယံုတာနဲ႔ သူငယ္ခ်င္းတရုတ္တစ္ေယာက္ရဲ႕ ဆိုင္ကေနယူၿပီးေတာ့ လုပ္ၾကည့္ပါတယ္ သူေျပာတဲ့အတိုင္းပါပဲ ဆရာႀကီး Vroot လည္းမရပါဘူး။ နည္းလမ္းေတာ္ေတာမ်ားမ်ား စမ္းၿပီးပါၿပီ လံုးဝမရပါဘူး။ ေနာက္ဆံုး အခုေရးေပးမယ့္နည္းလမ္းနဲ႔မွ လံုးဝအဆင္ေျပသြားပါတယ္..  100% အဆင္ေျပပါတယ္။ ပထမဆံုးလိုအပ္တာေလးေတြကို တစ္ခါတည္းတင္ေပးထားပါတယ္.. ေအာက္ကလင့္မွာ အရင္ေဒါင္းလိုက္ပါ

လိုအပ္သည္မ်ား ဒီမွာေဒါင္းပါ

ေဒါင္းၿပီးသြားၿပီဆိုရင္ ဖိုင္ေျဖၿပီးေတာ့ root ဆိုတဲ့ ဇစ္ဖိုင္ေလးကို မန္မိုရီကဒ္ထဲ ကူးထည့္ထားပါ
ၿပီးေနာက္ Recovery ဆိုတဲ့ဖိုင္ကိုေျဖၿပီးေတာ့ အထဲမွ recovery ဖိုင္ကို Desktop ေပၚသို႔ ဆြဲတင္ထားပါ
 ၿပီးသြားၿပီဆိုရင္ Odin ကိုဖြင့္ပါ Odin က PDA ကိုႏွိပ္ၿပီးေတာ့ ေစာေစာက Desktop ေပၚဆြဲတင္ထားတဲ့ recovery.tar.md5 ဆိုတဲ့ဖိုင္ကိုေရြးေပးလိုက္ပါ..

အေရးႀကီးတဲ့အခ်က္ကေတာ့ Odin မွာ F.Reset Time မွလြဲ၍ က်န္တာအားလံုးကို အမွန္ျဖစ္ ျဖဳတ္ထားေပးပါ။ အေရးႀကီးဆံုးကေတာ့ Auto Reboot မွာလံုးဝ အမွန္မျခစ္ပါနဲ႔ ။။ အမွန္ျခစ္မျဖဳတ္မိပါက CWM ဝင္မည္မဟုတ္သျဖင့္ အဆင္မေျပပါဘူး။ သတိရွိပါေစ

Tab3 ကိုပိတ္ပါ.. ၿပီးရင္ Power + Volume Down ကိုႏွိပ္ၿပီးေတာ့ Download mode ဝင္လုိက္ပါ။ ၿပီးရင္ ကြန္ပ်ဴတာနဲ႔ခ်ိတ္လိုက္ပါ Odin မွ Device ကိုသိၿပီဆိုရင္ အဝါေရာင္ အကြက္ေပၚလာမွာျဖစ္ပါတယ္။ အဝါေရာင္ အကြက္ကေလးေပၚလာတာနဲ႔ Start ကိုႏွိပ္ၿပီးေတာ့ Flash လုပ္ပါ။ အစိမ္းေရာင္ေလးနဲ႔ Pass လို႔ၿပသြားၿပီဆိုရင္ Tab3 က္ိုကြန္ပ်ဴတာနဲ႔ ခ်ိတ္ဆက္ထားရာမွ ျဖဳတ္လိုက္ပါ.tab ဟာ restart က်သြားမွာမဟုတ္ပါဘူး ဒီအတိုင္းပဲ ရွိ္ေနမွာပါ .. USB ၿဖဳတ္ၿပီးၿပီဆိုရင္ Tab ကို Power မပိတ္ပဲနဲ႔
Power + Volume Up ကိုႏွိပ္ၿပီးေတာ့ Recovery တန္းဝင္လိုက္ပါ CWM Recovery ထဲက္ိုေရာက္သြာားမွာျဖစ္ပါတယ္ ေရာက္သြားၿပီဆိ္ုရင္ install ကိုႏွိပ္ပါ .. Sd card မွ ေစာေစာက ထည့္ခဲ့ Root zip ကို ေရြးၿပီးေတာ့ install လုပ္ေပးလိုက္ပါ ၿပီးသြားရင္ Reboot Syatem ကိုႏွိပ္ၿပီးေတာ့ Reboot လုပ္ေပးလိုက္ပါ.. ျပန္တက္လာၿပီဆိုရင္ေတာ့ ၾကည့္လိုက္ပါ..  ၾကက္ေျခခတ္ ပံုစံ SuperUser ေလးနဲ႔ လန္းေနၿပီျဖစ္ပါတယ္ ..

Monday, 9 December 2013


Samsaung ဖုန္းအသုံးျပဳဖူးသူတုိင္း သိၿပီးသေလာက္ျဖစ္မွာပါ။ 
 
တစ္ခ်ဳိ႕ မသိေသးတဲ့ Online မ်ားမွ ေတာင္းဆုိထားလုိ႔ က်န္မသိတဲ့ မိတ္ေဆြမ်ား ရွိရင္လည္း အလြယ္တကြလုပ္တတ္ ၿပီးကုိယ့္ဖုန္း ကုိ ထိန္းသိမ္းလုိ႔ရေအာင္ အားအတြက္ ပုိ႔(စ္)ေလး တစ္ခုအျဖစ္ ထပ္တင္ေပးလုိက္တာပါ။ 
 
 ဒီလုိလုပ္ေဆာင္ေပးျခင္းအားျဖင့္ ရရွိနုိင္ေသာ အက်ဳိးရလဒ္မ်ားကေတာ့ Battery ၾကားရွည္စြာ အသုံးျပဳနုိင္ျခင္း နဲ႔ ဖုန္ျမန္းဆန္ ျခင္းမ်ားကုိ ေကာင္းစြာ ခံစားရမွာပါ။ 
 
လုပ္နည္းကေတာ့ လြယ္လြယ္ေလးပါ။ ေအာက္မွာ ပုံနဲ႔ တကြ ရွင္းျပေပးထားပါတယ္။

အဆင့္ ၁။ Samsung ဖုန္းမွာ ပါတဲ့ Home Button (ခလုတ္) ကုိ ၃ စကၠန္႔ေလာက္ ဖိထားပါ။ ေအာက္ပုံ အတုိင္းပါ။ (အႀကီးၾကည့္ရန္ ပုံကုိႏွိပ္ပါ)


မိမိဖြင့္ထားသမွ် အရာမ်ား ျပေပးပါလိမ့္မယ္။ 
 
ထုိအခါ ဖုန္းကုိ ခဏမသုံးေတာ့ပဲ ထားေတာ့မယ္ဆုိရင္ Background Run ေနတဲ့ အရာမ်ားကုိ ေဆးရပါမယ္။ 
 
နံပါတ္ ၂ ပုံစံ အတုိင္းလုပ္ပါ။ ၿပီးရင္ Samsung ဖုန္းမွာ ပါတဲ့ Home Button (ခလုတ္) ကုိ ၃ စကၠန္႔ေလာက္ ျပန္ ဖိထားပါ။
 
 ၿပီးရင္ အ၀ုိင္ပုံေလးနဲ႔ နံပါတ္ ၃ ထဲကုိ ၀င္ပါ။ ေအာက္ပုံ ကုိဆက္ၾကည့္ပါ။


ပုံပါအတုိင္း RAM ကုိ ဖိၿပီး ေအာက္က Clear Memory ခလုတ္ ကုိနွိပ္ေပးလုိက္ပါ။
 
 ဒုတိယ ပုံအတုိင္း RAM ပုိ မ်ားတာကုိေတြ႕ရပါလိမ့္မည္။
 
 ၿပီးသြားၿပီး ဆုိရင္ Ok သြားပါၿပီး ။ မွတ္ခ်က္။   ။မိိမိဖုန္း ကုိ တစ္ပတ္တစ္ခါ (သုိ႔မဟုတ္) ႏွစ္ပတ္ တစ္ခါ ေလာက္ေတာ့ Restart ခ်ေပးသင့္ပါတယ္။ 
 
 Restart ခ်တာ နဲ႔ Power Off တာက မတူဘူးေနာ္။ တခ်ဳိ႕မိတ္ေဆြေတြက ေျပာေတာ့ Power Off ခဏခဏ Off တာပဲ ဘာ Restart ခ်စရာလုိေသးလုိ႔လဲတဲ့။
 
 Power Off တာနဲ႔ Restart ခ်တာက လုံး၀ မတူပါဘူး။
 
 Restart ခ်တယ္တုိတာက ဖုန္းျပန္ အားတင္တဲ့ သေဘာပါ။ 
 
Power Off တာက ဖုန္း၏စက္ကုိ ပိတ္ပစ္လုိက္တဲ့ သေဘာပါ။


Ref : http://www.myanmarcnn.com

Saturday, 30 November 2013

Samsung Zawgyi Enabler V1.0 For Android


နုိင္ငံျခားေရာက္ျမန္မာေတြရဲ႕ ျမန္မာစာစနစ္မပါ၀င္ေသးတဲ့ Samsung ဖုန္းေတြနဲ႕ ျပည္တြင္းက ျမန္မာစာစနစ္ (Myanmar Language) မပါ၀င္ေသးတဲ့ Samsung ဖုန္းတစ္ခ်ိဳ႕ေတြအတြက္ Samsung Zawgyi Enabler လုိ႕ေခၚတဲ့ Android ဖုန္းေဆာ့၀ဲေလး တစ္ခုကုိ Myanmar Mobile App Store မွေရးသားထုတ္လုပ္လုိက္ပါျပီ ။

Android 4.2 ႏွင့္အထက္ ျမန္မာစာ (Myanmar Language) မပါ၀င္ေသးေသာ Samsung ဖုန္းမ်ားကုိ ျမန္မာဘာသာစကား Myanmar Zawgyi ထည့္သြင္းေပးမည္ျဖစ္ပါသည္။ ဖုန္းတြင္း setting မ်ားအားလုံးတြင္ ျမန္မာဘာသာစကားပါ၀င္လာေစမည္ျဖစ္ပါသည္။

Samsung Zawgyi Enabler ကုိအသုံးျပဳရန္ သင့္ဖုန္းအား root လုပ္ထားရန္လုိအပ္ပါသည္။

Samsung Zawgyi Enabler ကုိအသုံးျပဳျပီးပါက ဖုန္းရဲ႕ Setting >Language & input ထဲသုိ႕၀င္၍ Language တြင္ Myanmar (Zawgyi) ကုိေရြးခ်ယ္၍ ျမန္မာဘာသာစကားျဖင့္ ဖုန္းတြင္းစနစ္တစ္ခုလုံးကုိစတင္အသုံးျပဳနုိင္ေစမွာျဖစ္ပါတယ္။

နုိင္ငံျခားေရာက္ျမန္မာေတြရဲ႕ ျမန္မာစာစနစ္မပါ၀င္ေသးတဲ့ Samsung ဖုန္းေတြနဲ႕ ျပည္တြင္းက ျမန္မာစာစနစ္ (Myanmar Language) မပါ၀င္ေသးတဲ့ Samsung ဖုန္းေတြအတြက္အခု Samsung Zawgyi Enabler ေဆာ့၀ဲေလးက အေတာ္ေလးလြယ္ကူအဆင္ေျပသြားေစလိမ့္မယ္လုိ႕ထင္ပါတယ္။

Samsung Zawgyi Enabler ကုိေရးသားဖန္တီးသူကေတာ့ Myanmar Mobile App Store မွ ကုိသက္နုိင္စုိး(http://www.facebook.com/thetnaing.mmas) ျဖစ္ပါတယ္။ Samsung Zawgyi Enabler v1.0 for Android ကုိေအာက္က link မ်ားမွာ download ရယူနုိင္ပါတယ္။


Samsung Zawgyi Enabler v1.0 for Android (Link 1)

Samsung Zawgyi Enabler v1.0 for Android (Link 2)

Samsung Zawgyi Enabler v1.0 for Android (Link 3)

Saturday, 23 November 2013


Launcher 4.4. zip file  မိမိ computer အရင္ Zip File ျဖည္ျပီး ဖိုင္ထဲကေန Apk ေတြကိုအရင္
ထုတ္ထားလိုက္ပါ။ KitKat features 3ခုေတြ႔ပါမယ္။
  • PreBuiltGmsCore.apk (Google Play Services 4.0)
  • Velvet.apk (Google Search)
  • GoogleHome.apk (Launcher) တို႔ပဲျဖစ္ပါတယ္။
 
ျပီးရင္ Note 2 နဲ႕ computer ကို connect  လုပ္ျပီး Card ထဲထည့္လိုက္ပါ။
Step 2: Enable "Unknown Sources"
Unknown Sources ကိုအမွန္ခ်စ္ေပးဖို႔  Menu -> Settings -> Security and check Unknown sources.
Step 3: Install the Files
ျပီးရင္ က်ြန္ေတာ္ တစ္ခုျပီးတစ္ခု install လုပ္သြားလိုက္ပါ။ Ok ထိေပါ့။


Step 4: Set the Default Launcher
Files ေတြအကုန္လံုးကို installed ျပီးရင္  Home button  ႏွိပ္ပါ။ Pop-up ေဘာက္တက္လာရင္
သင္ၾကိဳက္တဲ့ launcher ေရြးျပီး allows ႏွိပ္ေပးလိုက္ပါ။
ျပီးရင္ေတာ့ သင္ၾကိဳက္တဲ့  Android 4.4 KitKat ရဲ႕  app icons, widget layout, အစရွိသည္တို႕
ေရာက္ေနမွာပါ။

Step 5: Use Google Now Easier
အခုက်ြန္ေတာ္တို႔  4.4 Launcher ထဲက voice commands ေလးသံုးျပီး "Okay, Google" 
လို႔ ေခၚလိုက္တာနဲ႔ Google အေပၚမွာခ်က္ခ်င္းေပၚလာမွာပါ။ ျပီးရင္ search anything  အတြက္
voice ေလးနဲ႔ပဲ Google ေပၚမွာေခၚၾကည့္ရေအာင္...

တကယ္လို႕ သူငယ္ခ်င္းက KitKat launcher ကိုမၾကိဳက္ေတာ့ပဲ အျခား launcher ေျပာင္းသံုးခ်င္တယ္
ဆိုရင္ Settings -> App Manager -> All and selecting Launcher ျပီးရင္ Clear Defaults
လုပ္ျပီး Home button ကိုျပန္သြားလိုက္ပါ။ ေနာက္ထပ္ပါ၀င္လာတဲ့  TouchWiz ဒါမွမဟုတ္
သူငယ္ခ်င္းတို႕ၾကိဳက္ရာကိုေရြးခ်ယ္ျပီးအသံဳးျပဳလို႔ရပါတယ္။
က်ြန္ေတာ္တင္သမွ်ပိုစ့္ေတြ Facebook ကေနရယူခ်င္တယ္ဆိုရင္ ဒီမွာ Like ႏွိပ္ပါ 

မန္ဘာ၀င္ခဲ့ျခင္းျဖင့္ ပိုစ့္အသစ္တင္တိုင္း မိမိ Gmail ထဲကိုတိုက္ရိုက္ေရာက္ရွိမည္ျဖစ္ပါသည္။ ထို႔ေၾကာင့္မန္ဘာ၀င္ခဲ့ဖို႔ဖိတ္ေခၚပါတယ္။

http://dl-4.one2up.com/onetwo/content/2013/11/20/e13b7a8ad1043670b35acd8e46625137.zip

http://www.solidfiles.com/d/86d1527af9/

Friday, 22 November 2013


Firmware ျပန္တင္ဖို႔ကုိ ေအာက္မွာေဒါင္းပါ။


Download>>> Gingerbread 

Download>>> Gingerbread

ပထမဆံုး ေဒါင္းထားတဲ့ rar ဖိုင္ကို ျဖည္လိုက္ပါ။ ျဖည္လိုက္ရင္ ဖိုင္(၈)ဖိုင္ရပါမယ္။ အဲဒီထဲက Odin3-v1.85….ကို…..run…လိုက္ပါ…။ ၿပီးရင္ ဖုန္းကုိပါ၀ါပိတ္ shutdown လုပ္လိုက္ပါ။ ထို႕ေနာက္ Download mode ကိုသြားပါမယ္ ။ power button +( Volume Down – ) + Home button ကိုတၿပိဳင္ထဲဖိထားေပးပါWarning!!……ဆိုၿပီးစာတန္းေတြေပၚလာရင္….အားလံုးကိုလႊတ္ၿပီး….(Volume Up+) ႏွိပ္ေပးပါ။

အဲဒီအခါ download mode ထဲသို႕ေရာက္ရွိသြားပါလိမ့္မယ္ ။ဖုန္းနဲ….ကြန္ပ်ဴတာကိုခ်ိတ္လိုက္ပါ။ ခဏေစာင့္ၿပီးရင္ ေအာက္ကေရးထားတဲ့အတုိင္း လိုက္ေရြးေပးပါ။

၁။ PIT –ဆိုတာေလးကိုကလစ္လုပ္ၿပီး…. totoro_0623.pit….ကိုေရြးေပးပါ၊

၂။ Bootloader-ဆိုတာေလးကိုကလစ္လုပ္ၿပီး- BOOT-s5360DDKK1-REV05 ကိုေရြးေပးပါ။

၃။ PDA –ဆိုတာေလးကိုကလစ္လုပ္ၿပီး…. PDA_S5360XXKI6_REV05 ကိုေရြးေပးပါ၊

၄။ Phone – ဆိုတာေလးကိုကလစ္လုပ္ၿပီး….MODEM_S5360XXKI6_REV05 ကိုေရြးေပးပါ၊

၅။ CSC – ဆိုတာေလးကိုကလစ္လုပ္ၿပီး….GT-S5360-MULTI-CSC-OXXKj3.tar ကိုေရြးေပးပါ၊

အထက္ပါအတိုင္း အားလံုးေရြးၿပီးသြားၿပီဆိုရင္ေတာ့ ……START….ကို…..ကလစ္လိုက္ပါ…..ေရႊးေပးတဲ႔အခါမွာ…အားလံုးမွန္ေအာင္ေရြးေပးပါ။

မိနစ္အနည္းငယ္ေလာက္ၾကာရင္ galaxy Y GT-S5360 ဟာ reboot……လုပ္လိမ္.မယ္……ၿပန္တက္လာရင္ေတာ့…….ဘာသာစကားေရြး… .Gmailေရႊး…..အားလံုးၿပီးရင္ေတာ့….Android V- 2.3.6version…ကို firmware တင္တာ ေအာင္ျမင္စြာၿပီးဆံုးပါၿပီ..။


Samsung ဖုန္းေတြအတြက္ ပိုက္ဆံနဲ ့ဝယ္ရတဲ့ တကယ့္ font လွလွေလးေတြပါ။
font 29 မ်ိဳးေလာက္ပါ,ပါတယ္။font ထည့္တာကေတာ့ လြယ္လြယ္ေလးရယ္။


Application ေတြ ဂိမ္းေတြ သြင္းသလိုသြင္းလိုက္ရမွာပါ။


သြင္းပီးရင္ ဖုန္းရဲ ့Setting>>
Display>>Font Style ထဲမွာ သြားေျပာင္းရံုပါပဲ။မၾကိဳက္ရင္လည္း ဖုန္းရဲ ့Setting>>
application ထဲဝင္ပီး uninstall လုပ္လုိက္ရံုပါပဲ။


ဖုိင္ဆိုဒ္ေလးေတြက 30KB ပဲရွိတာ
တကယ္ကို ေသးေသးေလးေတြပါ။


ကိုယ့္ဖုန္းမွာ font စတုိင္အလန္းေတြ ထည့္ခ်င္တယ္
ဆိုရင္ေတာ့ ေအာက္ကလိပ္စာမွာရယူလုိက္ပါ။အဆင္ေျပပါေစ။


Download


Cloud   l   Dropbox   l   Copy


Monday, 18 November 2013


Samsung Galaxy S Plus GT I9001 ကို Android 4.0.4 ICS ( Ice Cream Sandwich)အျဖစ္
(CM9) firmware update လုပ္ခ်င္သူမ်ားအတြက္ေအာက္မွာ step-by-step ရွင္းျပထားပါတယ္။

Pre-Requisites


A. ပထမဆံုးမိမိ ဖုန္းထဲက SMS, music, video, files, settings, အစရွိသည္တို႔ကို Backup
လုပ္ထားပါ။
B. မိမိဖုန္းကို battery အား 70% ထိရွိရပါမည္။
C. မိမိဖုန္းမွာ antivirus apps ထည့္ထားလွ်င္ အရင္ဆံုး Turn off or disable လုပ္ထားပါ။
D. မိမိရဲ႕ဖုန္းကို Settings => Applications => Development => USB Debugging ဖြင့္ထားျပီး
computer နဲ႔ connecting လုပ္ထားပါ။

ျပီးရင္ေအာက္မွာ ျပထားတဲ့အဆင့္ဆင့္အတိုင္းတစ္ခုျပီးတစ္ခုလုပ္သြားလိုက္ပါ။
အရင္ဆံုး  CM9 Android 4.0 ICS package ကိုေအာက္မွာအရင္သြားေဒါင္းလိုက္ပါ။

Updating Samsung Galaxy S Plus GT I9001


Step 1: First, you need to download the CM9 Android 4.0 ICS package save them into your computer in a directory you can easily find and access. The ICS package is around 120MB so depending on your connection, it may take a little while to finish downloading it.

Step 2: Connection your Samsung Galaxy S Plus GT to your computer using the original USB cable and copy both packages to your phone’s SD card. Make sure you don’t put them inside a sub-directory as they will become undetectable. After they have been copied, disconnect your phone from your computer and turn it off.

Step 3: Put your Samsung Galaxy S Plus into Recovery Mode holding down the Volume Up, Home and Power buttons together. If your devices fails to boot into Recovery Mode, do this step again until it does.

Step 4: Assuming you are now inside the Recovery Mode, choose “Wipe data/factory reset” followed with “Wipe Cache partition” to clear all the data in your phones memory.

Step 5: Still inside the Recovery Mode, select “install zip from sd card” then “choose zip from sd card” and browse to your phone’s SD card and choose “CM9 ICS 4.0.4 Package” then the “Google Apps” package.

Step 6: After you’ve chosen these files, it will take around 5 to 7 minutes for the device to update the firmware. You just have to wait until you will be brought back to the Recovery Mode screen. There are times when the device is rebooted automatically after the update.

Step 7: If you landed on Recovery Mode, choose “++++ Go Back ++++” and select “reboot system now,” otherwise you are good to go.
There you have it! That’s how you update your Samsung Galaxy S Plus GT I9001 to CM9 Android 4.0.4 ICS firmware. You can check the version to see if it’s really running on ICS 4.0.4.


Download CM9 Android 4.0.4 ICS Firmware (120Mb)
 
http://dl-9.one2up.com/onetwo/content/2013/11/18/7e88407b7fa21a3704b2804beae82c26.zip